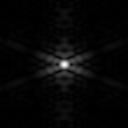
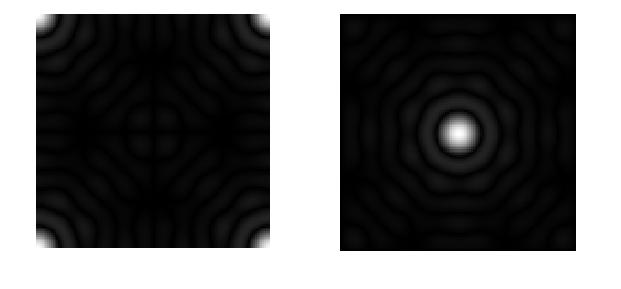
Given that the circle I made of radius 0.1 out of a meshgrid of 128×128, I got a fast Fourier Transform given by figure below(on the left) and the shifted Fourier Transform shown beside it. Here after doing the shift, we can observe concentric pattern similar to an airy disk which is the theoretical(expected) Fourier Transform of a circle.
 Applying another fourier transform to my fft’ed circle, i get to the same circle i started.
Now, if i use letter A instead of a circle and apply fft to it. I get the figures shown below.
 Letter A created in Paint
The shift only makes the corners of the fft of an image and stitches it to become its center part. If i apply another fft to the already fft’ed letter A, i get the same letter but inverted.
Now working on convolution, where the letters VIP are convolved to an airy disc of varying width. This can be compared to an optical system where the circle will serve as as aperture after a light source whose form forms the word VIP passes through a lens. Here, after light pass through a lens, it is now fft’ed. So, the simulation is the same as varying the size of the circular aperture and observing the form of the light source afterwards. The results are shown.
We can now see that if we convolve the image VIP to and airy disc of increasing width i.e. also the fft of circle with decreasing radius, we see the letters to be less sharp. This can also be interpreted in such a way that when the aperture gets smaller such that diffraction of light is significantly relevant since the middle potion or the part where light can pass through without getting refracted decreases. Also, a smaller amount of information from the light source is allowed to pass through a smaller aperture so we expect that the image formed gets farther from the original form of the source.
We now proceed to the results of template matching using correlation. So, first correlation mesures how close an image is to another. This is just convolution of an image to the conjugate of another. The image of the phrase ‘THE RAIN IN SPAIN STAYS MAINLY IN THE PLAIN’ is correlated to the image of letter ‘A’ having the same size as the ‘a’ in the phrase.
 From the term correlation, we would expect that it would select, in our case, the A’s in the phrase. The peaks seen on the product side are 5 and they corresponded in location to the A’s in the phrase. Other letters don’t have the peaks. We note here that if a letter resembles some form in shape of an A then the correlation is higher than those farther in form like having curves like letters S and P.
Moving on with edge detection, we choose a 3X3 matrix whose sum is zero and convolved it with the VIP image. The results are shown.


 As i can observe, when we use a matrix whose edges have the same value like the third figure, the edges are well defined in the horizontal and vertical direction. However, the edges of the curved lines are not that defined. If we use a matrix whose vertical edges have the same value, so is the vertical edges of the image while for the horizontal edges of the matrix having the same value, the horizontal edges of the letters are defined.
This activity is very well intact and has been reiterated in my IPL learnings excluding the last part which I found very puzzling. I hope my inference is correct. No problem executing the procedures. Anyway, it is the interpretation that matters. I give myself a grade of 9.

